

Match Grade M1 Garand in 30-06.
OK, as I am completing this post, I am realizing that it gonna be a really really long one. So, sit back pour yourself your desired libation and relax. I promise you that it takes a much shorter time to actually do this than it will require to read about it! That being said…
You’ve inspected, rejected, sorted, tumbled, obsessed over primer pockets, primed and reamed case mouths and now you wanna make some ammo! What’s next?
Doing Your Homework!
Literally anybody can take some smokeless powder, stuff it into a case ram home a projectile and call it reloaded ammo, but don’t you want yours to be special? I mean shiny and bright is good and a nice boom without any shrapnel is also good, but what happens down at the target end is usually what it’s all about. Therefor the first thing you have to do is to decide upon what this batch of ammo is going to be used for.
Within the limits of the particular caliber and platform you are using, your ammunition can be used for target, hunting, or even defense. It can be used for silhouette, bullseye, or cowboy action shooting, a national match course or high power prone match. The list goes on and on. So does the advice. Once you get involved in a particular game, typically, the line gathers around after a relay and the various stories begin being shared about loads and best equipment. Pay attention, but also pay attention to the source. There are those who we kind of feel comfortable listening to and those, shall we say, whose advice needs to be considered with a degree of prequalification. So what should be your take away?
The reloading crowd experience of your particular interest or discipline will usually provide you with some very basic information to use as your starting point. Generally this will be an assortment of appropriate projectiles, i.e., manufacturers, a range of projectile weights and bullet styles. Generally you will also walk away with a feeling about the preferred propellant (powder).
In our little imaginary world, we are competing in the 200 Yard National Match Reduced course of fire using 30-06. We have come away with 168 grain Sierra HPBT as the common preferred slug and IMR 4895 as the preferred propellant. You should ignore for now any reference to charge weights.
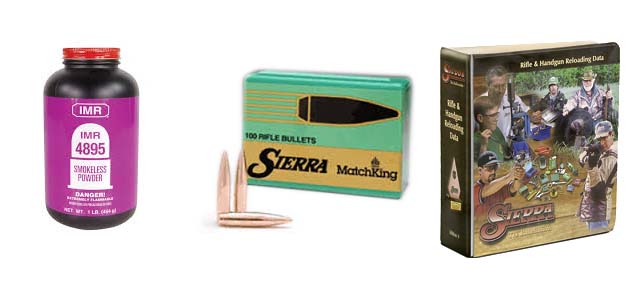
The basics required for reloading your prepared and primed cases. It is impossible to reload safely without all three.
So what should be the next thing you go out and buy? The Sierra Reloading Manual! If your projectile choice had been Hornady, Nosler, Berger, or Speer, your decision would be the respective projectile manufacturer’s manual. Why? Simply because they service what they sell and they want you to derive the best results possible from their products. They test all of the loads listed for both performance and safety and their recommendations should be followed to the letter!
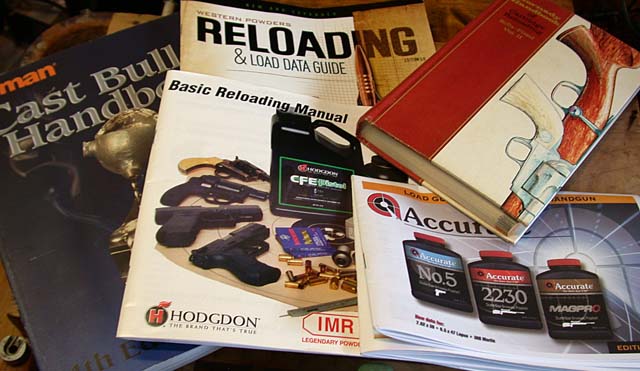
There are myriad sources for powder load specifics, the least reliable of course are internet blogs. Pick your manual and stick to it! Some powder Mfrs. do post their reloading data online, and that IS reliable.
There are also manuals written by the Powder Manufacturers, as well as Lee and Lyman. But, for starters (and for some shooters, their entire reloading careers) the bullet manufacturer’s reloading manual has provided the broadest range of possible solutions for specific reloading applications.
Your manual has now arrived at the house, so pour yourself a short scotch and settle into your favorite easy chair and read the manual’s section on basic reloading practices. Enjoy it because this is the ONLY TIME you will be able to have a drink and participate in any activity associated with reloading!
Take your reloading manual of choice and take the time to read the section on basic reloading practices. This is the ONLY time you are permitted to make an offering to Bacchus while engaged in firearms related activities.
OK, you’re done reading the manual? Fine! Now listen closely! If what you have just read, differs in any detail from what I am espousing here, ignore me and follow what the manual tells you! I am writing this blog simply because I can’t be shooting or reloading, or otherwise playing with my guns. I am no expert and the bullet manufactures and the manual authors are! Follow their advice! That being said, let’s get started.
Check the Reloading Manual for EVERYTHING
If we take a moment now and look up our cartridge/bullet combo, we see a chart indicating our possible powder and weight combinations to drive our projectile down range.

Your bullet mfr. reloading manual often provides the most complete selection of powders and loads for a particular projectile. The weights are blurred intentionally. Go buy a manual!
For the moment, flip back a page or two to the first page of the cartridge section and we find that the opening page of our section on the 30-06 cartridge has a drawing of the SAAMI specs for the cartridge dimensions! We also see the specifications for the test firearm used to develop the loads. Whoa… Shades of the last chapter! The important part we are going to notice is the COL, or cartridge overall length. That will become important very soon.
For each cartridge listed in your reloading manual there is a cartridge diagram and a description of the test firearm used to derive the load information. It is important to bear in mind that the TEST FIREARM IS NOT your hunting rifle!
OK we have our press and dies, and we have our primed cases. We have purchased our heads (projectiles/bullets), and we have finally (after an exhaustive search and several month wait) managed to secure some of the powder of choice. We will also require, a powder scale, trickler, and some check weights. If we are going for volume we would also like to have a powder dispenser, but this is not necessary in the beginning. Since our next step is a “pressure series,” we really want to weigh each charge anyway. So a dispenser really optional at this point. But I get ahead of myself.
Setting Up Your Seating Die
Since this is the first time we are loading for this cartridge and rifle, we are going to be creating a “Standard Cartridge” which we will use to help set up the die in the future. Loosen the locking ring and set screw on your seating die and begin screwing it into your press a few turns.

Screw your seating die partially into your press in preparation for creating your “standard cartridge.”
Next take a resized, uniformed, empty unprimed case (for the caliber/cartridge you are reloading) and put the case into the case holder and raise the ram fully. Now continue screwing the seating die slowly down over the cartridge case. Stop when you encounter a slight to moderate resistance. The initial moderate resistance you feel as you screw the die into the press, should be the crimping restriction contacting the case mouth. Make certain that the resistance is NOT the locking ring bottoming out first or just dirty threads. At this time screw the bullet seating stem out of the die as far as it will go, being careful not to upset the die’s position in the press as you haven’t set the locking ring yet, intentionally!
After raising die with uniformed empty, unprimed case, screw seating die to contact case mouth, then unscrew the seating stem.
The easiest way to set the initial bullet seating depth is frankly a factory cartridge with an equivalent weight projectile and approximate bullet style to your proposed load. Insert it into the case holder, slowly raise the ram fully, and then screw the seating stem down until contact is made with the bullet tip. This should be a just fine initial seating point. Set all the locking rings and set screws and you’re good to go.

You can use a factory load as the standard for initial seating die set up for bullet seating depth.
If on the other hand you have no factory round, you can proceed as follows.
Take the empty unprimed case and insert a projectile into the case mouth.
Lower the ram, and place a bullet into the case neck and guide the case and bullet into the die as you slowly raise the ram to fully up. Now begin screwing the seating stem down into the die. You will feel the resistance as the bullet begins to seat. Lower the ram slightly and screw the stem down a bit, raise the ram to begin seating the bullet, and lower it again. Measure the COL (cartridge overall length). Remember that SAAMI drawing? Check the recommended COL against what you have in your hand. Do the math and you have a good idea how much more to screw in the stem. Don’t go all the way in one shot, screw a lot, measure. Screw a tad more, measure again. Once you get the correct COL, back the seating stem out again. What the XXXX? I just spent half an hour getting it right!!!

Determining the correct setting for your seating die is a series of adjustments to conform to the correct COL derived from your reloading manual.
Yeah I know, but there’s more to do. Right now our seating die is sort of just loosely screwed into the press. And if you recall we stopped screwing it in as soon as it contacted the case neck. Now we have to set our die for the amount of crimp (or lack thereof). Like always, there are two schools of thought on this one. Some guys don’t crimp if they’re using a bolt action shooting single shots. But if you are using any kind of repeating action and especially autoloaders, you may need to apply some kind of crimp and there are numerous arguments for and against this. If you do not crimp, either, you may eventually force a bullet further back into the case upon chambering which, can cause a catastrophe! Or you will go to unchamber an unfired round and it will come apart leaving the slug in the chamber throat and the powder all over your action. Either scenario will ruin your day to some degree or another.
Below are examples of some types of crimp. Bullets either have, or do not have, cannelures, grooves around the circumference of the bullet. If they have a cannelure, they want the case neck crimped into the groove, making deciding upon COL and seating depth much easier. If they do not have a cannelure, crimping is optional, but it should NOT DEFORM the bullet itself! Typically this means ever so slight a crimp, more simply of sizing the neck rim down ever so slightly to hold the bullet in the neck better.
Left to right, a no crimp target load, a slight crimp for semi auto and a factory crimp for hunting ammo.
So, we’re gonna apply a crimp, albeit a slight one (and you will have trouble seeing it!). I typically adjust the die down 1/16th of a turn from its initial contact. This seems to apply what I feel is a slight enough crimp to not distort the bullet or bump the case shoulder, yet it has never failed me in semi-auto rapid fire! At this point, screw the outer ring (locking ring) of the die down to contact the top of the press, and softly set the set screw to secure the ring in place, thus securing the adjustment.
What you have now achieved is to seat the bullet to SAAMI COL and apply the appropriate crimp. Take this unprimed and powderless dummy round and make certain it chambers in your rifle. If it does so without any resistance you are well on your way. If the dummy round encounters resistance in chambering, and your CASE measures in conformity to SAAMI dimensions, you may have seated your projectile out too far. This is more likely to occur with heavier and lighter projectiles. It is likely that you will eventually want to tailor the seating depth to your specific projectile/rifle combination, but if you have followed the above you should have a decent seating depth.
In a short aside, the benefit of agonizing over uniform case length can be seen in the following item. This is a stone stock GI en bloc clip randomly selected from a can. If you look closely you will see varying seating depths and varying crimps. Particularly check out what appears to be a short case and it’s crimp and the depth of the cannelure. That being said, hey, I’ve actually shot reasonably well with, out of the can, GI in high power matches. Your decision on the degree of OCD is your own!

A stone stock GI en bloc clip showing a dramatic variation in seating depth and crimp. the red arrows direct you to the extreme variation and the blue arrows show you the short case in the inset, the yellow the long one.
PS, GI cartridges are also generally neck sealed with some sort of tar like material, hey, who knows what matters really? It pretty reliably goes bang when asked to!
The exception to the book COL is if you are using unusually light projectiles. If so, you will have to adjust the COL to seat the bullet more deeply into the case neck. Our goal here is to bring the projectile ever so slightly shy of touching the lands of the rifling in our particular chamber throat. Most very light projectiles have a steep ogive which allows for adequate seating and throat engagement but which WILL call for a shorter COL. You can observe this in the crimp comparison image above. The factory round is a lighter projectile and the COL is shorter. Yet if you observe the bullets just below the word “crimp” you will note that this is approximately where the bullet taper begins (ogive). This is the part of the projectile that will engage the throat and lands of the rifling, but much more on this later, in a separate post. SUFFICE TO SAY YOU WANT YOUR ROUNDS TO COME VERY CLOSE TO (but shy of ) ENGAGING THE RIFLING in the barrel throat. Again we will have a detailed post on determining this in the reasonably near future.
Mid range projectile weights should perform well using the method described above. Heavier than usual projectiles will need to be seated more deeply into the case mouth. If you are in doubt, compare your dummy/standard with the overall dimensions of factory ammo using the same bullet weight and style for appropriate seating depth. If you are still in doubt, check with your local reloading buddy whom you trust implicitly and see if he has a good working COL. Sadly the SAAMI drawing does not cover all contingencies. Let’s just call this an artful science.
Once you are satisfied with your seating depth, tighten up all the set screws on your dies and seat another bullet into an empty unprimed case, measure it against your “standard.” If all is well, we can proceed to setting up our powder charge. Take that newly seated bullet/unprimed case and label both of them for their COL. I guarantee you that one day you will accidentally “bump” one of the slugs in your “standard cartridge” more deeply into the case and throw off your standard, so now you have a reserve.
It saves time to reserve cases and dummy cartridges which you have set up to your desired dimensions, They aid in setting up your dies and trimmers by getting you close by feel during the setup. Always measure the resulting output from the operation. “Trust, but Verify!”
Determining Your Powder Charge(s)
When we look up the cartridge, powder, and bullet combinations in our reloading manual, low and behold, we discover not a simple answer, but rather a range of possible charge weights for our chosen powder and projectile combination. We also see a Starting Weight and Maximum. In this particular manual the Max charges are listed in a green block. DO NOT START THERE!
Your bullet mfr. reloading manual often provides the most complete selection of powders and loads for a particular projectile. The weights are blurred intentionally. Go buy a manual!
Max charges are developed using a “Standard Receiver” under lab conditions. This is a piece of test machinery and NOT a factory rifle! If you insist on loading hot loads start your series AT LEAST 10% below the Max charge. (P.S. the trade will love you for this too, you’ll be shooting out your barrel in short order and contributing to the powder shortage, but go ahead!) For the rest of you, read on!
Because in our imaginary scenario, we are shooting at only 200 yards, and punching paper targets, we do not require the heavy bullet or maximum loading that longer ranges would require. Because we are punching holes in paper and not meat, we can select the high ballistic co-efficient bullet design over some of the other possibles designed for their performance upon impact. We can also tailor our powder charge to what shoots the smallest group in “X” rifle with “Y” bullet and “Z” powder, without worrying about terminal performance. We are simply looking for the smallest size group down range! If we have paid attention out at the range, we may have overhead somebody’s “pet load” for our cartridge. If they are shooting the same model rifle, and using the same components over the same course of fire, we can now see where that load fits within the data provided in our reloading manual. If it is within the mid range of the recommended combos, we can use that as our MID POINT in our PRESSURE SERIES. Read on…
Getting The CHARGE RIGHT
Set your balance beam scale on a level surface. Install the powder tray, and set the poises to their zero points. Next adjust the foot until the pointer of the beam indicates zero.
To dispense powder at a particular weight, obviously we need some means to measure that weight. We will require a some type of scale. We will also require some form of powder measure and a trickler. Scales can be balance beam type, or digital, but both require set up and adjustment. Follow the manufacturer’s instructions and be certain to use them in a breeze free environment. You will truly be surprised to see what a small downdraft can do to a charge weight. No I really REALLY mean this. I have seen the charge weight vary by as much as a full grain based upon drafts hitting the scale. And always verify the indicated weight on any scale with check weights. They’re relatively inexpensive and when you start approaching max loads they can save you from costly mistakes.
Once you are happy with your scale’s level in a spot free of drafts, you can zero the scale. Check your poises for zero settings and then turn the foot until the scale indicates zero. Next Use your check weights to verify your scales’s accuracy. Do this every time you set up!
Setting up a balance beam scale is a reasonably simple task. Set the scale on a level surface, free of drafts. Adjust the beam “poises” to their individual zero positions. Place the powder pan on the scale and “zero” the scale by adjusting the foot until the pointer indicates zero. Once you have done this take a check weight and set the poise(s) to the weight indicated on your check weight and weigh your weight. The numbers should agree. If so, you have successfully zeroed your scale.
We should now set up our scale for the first load weight in our series. We will start with the lowest weight we have decided upon increasing the charge weight by half a grain loading 5 or 10 rounds at each weight. You’ll want 5 rounds to shoot groups on paper and 10 if you’re going to chronograph the loads. However, if you are the owner of a chronograph you’re probably not reading this anyway! That aside, shooting one round at each weight shows us nothing John Snow! We will need to fire “groups” when we go to the range to determine which load works best in our PARTICULAR RIFLE. This is just as likely NOT your friend’s pet load, but it may well be, so hey, we’ll soon see. The proof ultimately is in the shooting! Back to setting up the scale.
Set your scale for the selected charge on an approach to weigh basis, adding up the values to equal the desired weight.
You now adjust the poises on an approach to weigh basis for your starting load. Our fictional example will be 44.8 grains. To achieve this, set the first poise to 40, the second to 4, and the last to .8 which would yield a charge of 44.8 grains. (not that I am recommending any such charge, but it gives you the idea)
If you’re lucky enough to own a dispenser, after initial setup you simply enter the charge weight and wait! Beep and you’re good!
If you are fortunate enough to be able to afford a combination scale/powder dispenser, simply follow the set up instructions and enter your first charge weight. The dispenser/scale will automatically deliver the appropriate weight of powder into the pan. Take an empty, primed case, place a powder funnel over the case mouth and dump the weighed powder charge in to the case.
Dump your weighed powder charge into your primed case using a powder funnel.
If on the other hand we are in our newbie stage or working on a reasonable budget, we will be manually dispensing our powder charges. There are available “dippers” which allow you to scoop up a volume of powder, and you can make your own using non-static materials. You would use the dipper to get you “close” to the desired charge weight, and then you will trickle the remaining powder required into the pan until the scale zeros out at your desired weight.
Adjust your measure to “close” to the weight you desire, and dispense powder into the scale pan, then use a trickler to complete the desired weight on your scale.
Be your own best friend and spring for a Powder Measure. Adjust your measure to dispense just shy of the desired weight and use the trickler to finish the charge. If you were loading a volume of ammo at a fixed weight, you would adjust the Powder Measure to throw the charge you desire with each cycle of the dispensing handle, but since we are going to be working up a pressure series here, the time to set up the measure for each charge is simply not worth it so we will weigh every charge.
Now if you have been actually paying attention, you will have noticed that in most images showing the powder scale or dispenser, you will see the powder container on the table near the scale/dispenser. I do this intentionally. If you are interrupted and you have powder remaining in the dispenser after reloading and time goes by, and you come back ready to sit down to a new session and you go… What the heck powder is in there? You can’t tell but you’re pretty sure it is IMR 4895, so you dump it back into the IMR 4895 can, but was it maybe Hodgdon 4895? Oh Heck! now you have a useless can of mixed powder. Never mix powders! Never guess at what a powder is! Powders can share numbers, but that does not mean they are the same, they are not! Use data ONLY for the specific powder you are using!
Store powder ONLY in original containers, and always leave the ONLY the original container of the powder you ARE DISPENSING near your dispensing station until it has been expended or returned to the original container to be placed back into storage. Do Not leave powder exposed to the air for extended periods. It is hydroscopic and it will absorb moisture and this will vary it’s density and resulting weight. Do not leave powder in the dispensers when you are finished. Return the powder to its original container! Got it?
The Pressure Series
When we are faced with what most of us call “working up a load” we are talking about tailoring a particular bullet and powder combination to a specific rifle. Yes commercial ammunition is pretty much uniform and works well in most rifles for which it is suited. We reloaders, on the other hand, by virtue of the range of choices we have in assembling a cartridge, have the opportunity to tailor the bullet/powder/primer combo to each particular arm in our inventory. The process is one of varying one element at a time of the various potential combinations. We have limited our initial selection of variables by listening to our peers at the range and have decided upon the bullet and powder combination. So now, we will vary the charge weights to determine what shoots best in our particular rifle.
Your bullet mfr. reloading manual often provides the most complete selection of powders and loads for a particular projectile. The weights are blurred intentionally. Go buy a manual!
We will do this by loading up a series of charges starting with the minimum listed and increasing the charge by .5 grains to 10% below the maximum charge listed. I avoid max charges unless necessary, while I don’t mind recoil, I don’t see any really good reason to punish myself or the rifle with extreme loads, unless I’m shooting beyond 400 yards.
So, if we are using IMR 4895 behind a 168 grain Sierra Match King, my old Sierra Manual lists a starting charge weight of 4x.x grains and a maximum of 4x.x (less 10% equals 4x.x rounded off to 4x.5). So we will load five or ten rounds each at half grain increments. We will then take these to the range and shoot them either from prone, a supported bench position or a real bench rest if you are lucky enough to own one and see which groups best from our rifle.
Ultimately you’ll probably want to shoot your newly minted pressure series. Shooting from a bench or prone position will show you which load groups best in your rifle.
If you choose to use “Range Data” derived from chats on the line (not online) , start a few grains below that data, and work up to that range load in half grain increments, but never never go above max load data in your manual.
Are You Ready for It! Here We Go!
But first we gotta load ’em up. If we are using a balance beam scale, our initial charge should be dispensed near to the desired weight, either from a powder dispenser, or a handy measure or dipper. These should be pretty much static free and non ferrous to avoid sparks or sticky powder refusing to drop from a static charge. The remainder of the charge weight should be dispensed from your powder trickler until the balance beam centers on the zero line. Take the powder pan with the powder, hold a powder funnel over the case mouth and dump the powder into the primed/uniformed cartridge case.
- Take that case, place it into the case holder on your press with the previously set up seating die.
- Set a bullet into the case mouth and raise the ram, gently guiding the bullet into the die’s mouth.
- Raise the ram the rest of the way, and you should feel the bullet seat into the case.
- Retract the ram and out comes your very first ever reloaded cartridge.
- Measure the completed cartridge against your desired COL.
- Inspect it for cracks, dents, burrs, protruding primer, make certain it looks good!
- Celebrate!
Your very first ever complete cartridge! Congratulations! You may want to reserve and frame it for the man cave!
Measure the COL to assure conformity to the SAMI drawing or your personally established COL. Inspect the case and finished round and if all is well, place it into your ammunition loading block or cartridge storage box. Repeat this process five or ten times and then increase your charge weight by 0.5 grains and go again. Repeat all of the above steps until you have completed your pressure series.
It is of course important to identify the rounds as to which group of charge weights the particular cartridge belongs. In our attempt to uniform every possible aspect of our cases, bullets etc, it is virtually impossible to tell the buggers apart. Memory, of where in the loading block or box the group is place is also a bad method. So, you have to mark them somehow. Standard practice involves markers and primer/cartridge bases. You can figure this part out for yourself but it usually involves colors, stripes and circles or lines.
Clearly you will also require a written record of the powder weights and all manner of obsessive compulsive record keeping. We will write up a separate article for that one as well, but suffice to say that if you can’t identify which loads are which , all of the above effort will be in vain.
Obviously if we have proven our load and decided upon the magic number of grains of powder that works best in our rifle, the process becomes much simpler. Our balance beam is set to the desired weight and we can dispense our powder accordingly. Typically our investment has included a powder measure which, once adjusted, can throw surprisingly accurate weights of powder. Prudence suggests weighing every fifth or tenth throw to assure accuracy and avoiding overweights. Some reloaders prefer to throw a slightly under charge and finish with a powder trickler and a scale, effectively weighing every charge. I have tried both methods and frankly found virtually no difference. My hand loads shoot better than I do in any case.
I have graduated to a powder dispenser and electronic scale which makes pressure series a whole lot easier in that all you need do is enter the charge weight, and it dispenses the weight. I have also found very little variation in shot group sizes between thrown charges and dispensed. Particularly in human supported rifle shooting, bench rest is another matter perhaps. Lastly, I compared the balance beam and the dispenser and they totally agreed both ways.
Finally, there is also another seating die that again makes life a lot easier. Typically referred to as “Competiton” or “Match” dies, they feature a micrometer adjustable seating head, as well as a window that allows you to drop the bullet into the die and have it guided into the proper seating position. These allow you to adjust the seating depth “on the fly” and eliminate deformed case mouths and/or projectiles from improper alignment during seating. That being said I got along for decades using the straight out of the box regular dies. A Competition Die was pictured in the final finished cartridge image above. I was shocked to see how much more expensive these dies have become since I purchased mine long long ago. But it’s your choice.
Sorry for the length of this one! Once again, everything you read here is solely for entertainment value. Nothing written here should be construed as dogma or doctrine, I am a regular dude and prone to “screwing the pooch” periodically! In fact, my next anecdote is going to be about just such a recent boondoggle.
Follow the authoritative published resources and you will develop a life long hobby that remains rewarding long after other ardors have cooled (if you know what I mean)! I need a drink…
Next Up: So You Start Feeling Cockey… And Then…
