
Match Grade M1 Garand in 30-06.
Ok so you’ve gone out and bought or otherwise secured the stuff to make cast bullets. You’ve read through the Lyman Cast Bullet Handbook and you’re ready to start down the rabbit hole. You’re all dressed up in the appropriate clothes and you’ve cleaned and decluttered your casting area. You’ve also spread out a nice folded bath towel to provide a soft landing place for your newly cast projectiles as they cascade rhythmically from your dancing moulds.

By far the easiest projectile to cast is the pure lead round ball. Used in most black powder replicas, long rifles flint locks, cap and ball revolvers etc. The round ball is a great place to start playing with casting.
If by any chance you’re lucky enough to be a black powder shooter, the easiest way to get there from here is to start by casting pure lead balls for your smoke pole. If you’re a modern pistol or rifle shooter you’ll be needing to get some appropriate bullet alloy. To start out, I’d recommend buying what you need to make it easier. Roto Metals sells ready to use pure lead as well as Hardball Bullet Casting Alloy which is suitable for most pistol and some (read this a modest velocity) rifle bullets. Start out with one or the other of these. One of the most interesting and and at the same time vexing aspects to casting your own bullets is mixing your alloys. That, however, is a topic for another time, so for now we are assuming basic pure lead or some other ready made alloy is sitting in your pot ready to get hot. So, all righty then, it’s time to turn on our pot.

I started this pot with some scrap bullets and messy lead as well as some clean alloy simply for demonstration purposes, to create a good level of dross. Normally you shouldn’t see this much debris in your casting pot.
While you are waiting for the lead in the pot to melt, it’s time to get your moulds ready. Moulds are typically either aluminum (Lee) or steel (RCBS and others). Lee aluminum moulds come with handles and are less expensive, RCBS moulds and handles sell separately and are more costly. If you are starting out (probably, or you wouldn’t be reading this) buy one or two of the Lee moulds and make them what they refer to as “tumble lubed” designs. These bullet designs allow the use of Liquid Alox Lube, also by Lee. To lube them (after your finished batch has cooled down to room temperature) you simply dribble some of the liquid lube onto a tray of finished bullets and shake and roll ’em around until they are uniformly coated with the goo.
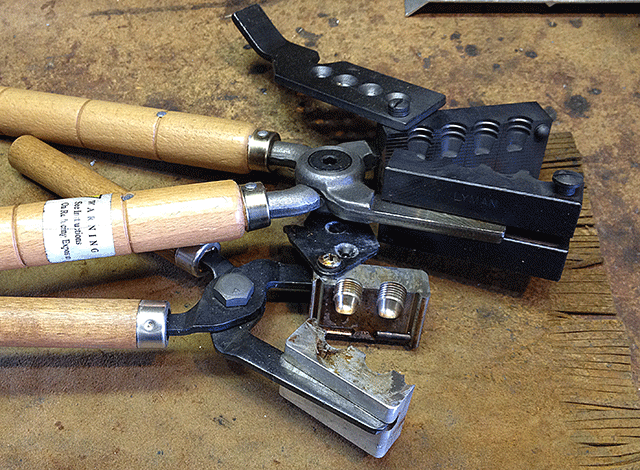
Lee Aluminum 45 mould (foreground) and an RCBS 4 cavity 45 mould in the background.
The aluminum mould above with the finer ridges is such a design. More traditional designs with deeper and larger lube channels, like the four cavity RCBS mould above, require a different method of lubing using a lube sizer press and dies, or what is called tray lubing. We will also cover lube methods in another article. For now the difference between Aluminum and Steel moulds is one mostly of cost, weight, heat handling, and durability. But we are going to be assuming you will be using a tumble lube design. Round balls for black powder arms do not require lube, as they use lubed patches on loading.
Always degrease your moulds prior to use. When you put them away after use, you will oil them. Clean them with mineral spirits to remove all oil. Failure to do so will result in wrinkled and deformed projectiles.
Back to getting the moulds ready. All moulds need to be degreased prior to use. Clean them thoroughly with mineral spirits and allow them to air dry. Now that they are nice and clean, let’s dirty them up a bit. Take two wooden matches, light them and then, “smoke” the mould.

Be generous with your smoke from the match. It is better to smoke a warm mould rather than a dead cold one to avoid condensation. The black soot deposited on the mould helps release the cast bullets from the mould.
Hold the matches and allow the flame to play over the inner surfaces of the mould to deposit a uniform black layer of soot on the internal surfaces of the mould cavities, and the area around them. This is done to provide a “Non-Stick” surface which helps the cast bullets to drop more easily out of the mould. There are other methods such as release agents like Frankford Arsenal’s Drop Out Spray. Some folks use a candle for smoking, but in my experience, I still prefer the match.
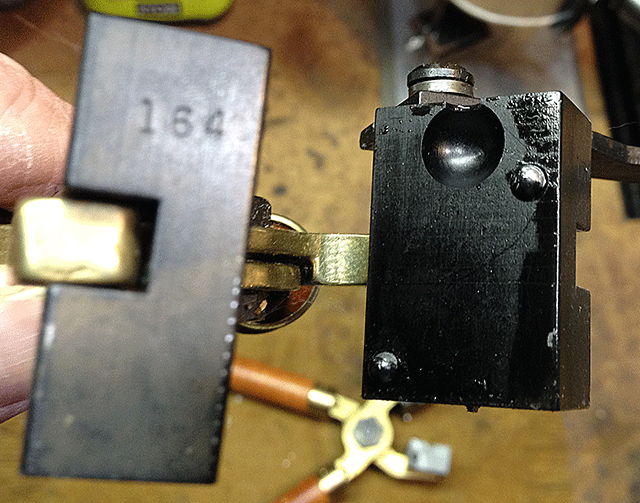
The face of the mould bodies show diagonal striations. These are not machine marks, but rather air vents. As the lead pours filling the cavity, the air inside is bled off by these vents.
There are little striations in the face of the mould plates. These are NOT tool marks, they are actually vents to allow the air in the mould to escape. Spray agents tend to clog these if used excessively. I believe the use of a candle to smoke the moulds can deposit unburned paraffin onto the mould cavity which can produce wrinkles similar to oily moulds. So I use matches. During a casting session if bullets start hanging up in the mould, I will occasionally use the spray sparingly.

There are three ways to “smoke” your moulds, matches, spray release agent, and a burning candle. I prefer the match, but also use the spray during sessions. The candle is also used for lubricating parts of the mould.
How’s that pot doing? Feel free to turn the dial all the way up to get the lead melted, but after it’s all liquid, you’ll want to turn it down about 1/2 way or so. You’re going to want the lead between 650 and 750 degrees depending upon your alloy and the results of your casting. Here’s where that casting thermometer will come in handy. But, you can get decent results without it by watching how the casting is going and adjusting as you go.

The only difference in these casts is the temperature of the mould/lead. The image shows too cool, too hot, and just right lead/mould combinations.
Lead that’s too cool will leave voids in your bullets, and too hot will drop out and turn “frosty.” If you find that the bullets appear “wrinkly” it means that you did not clean the moulds adequately or again your mould may be too cool. For the record, with pistol at any rate, I do not discard frosty bullets. They appear to shoot to point of aim just fine, and some even claim that they hold lube better. Jury’s out on that one, but Like I said, I’ve never seen a reason to recycle them.

You can preheat your moulds by resting them on the edge of the pot, or by holding a corner of the mould in the melt. This is more necessary with steel moulds than aluminum which heat up very quickly often in as little as two or three pours.
While you’re waiting for the lead to totally liquify, you’ll want to start warming your moulds up. Position the mould so it sits comfortably and reliably resting itself on the pot rim, This is less important with the aluminum moulds, but steel definitely needs to be heated up.
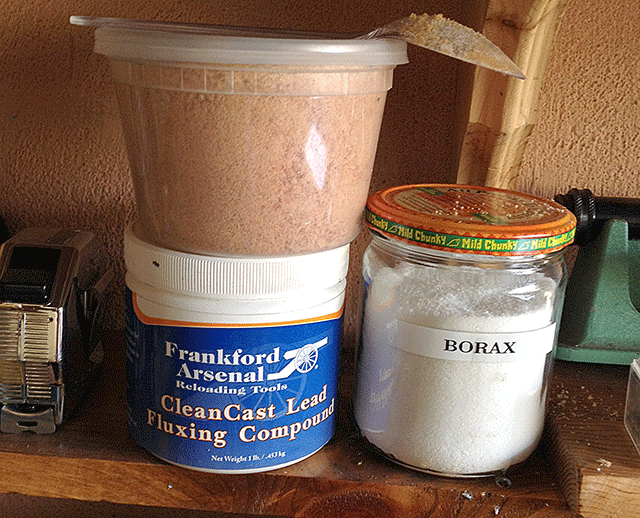
Three of the more common flux agents, Frankford, Borax, and sawdust. Some folks also use waxes and/or bullet lube. I stick with these three in various combinations.
OK, your lead or alloy is finally liquid, but there is a grey film over the top of the melt, and it looks like there are some chunks of junk floating there as well. Time to FLUX! Yep you guessed it once again there are multiple choices. Folks have used, bees wax, candle wax, sawdust, borax, bullet lube, Crisco, and practically anything that smokes or smells. There are two things flux is supposed to do, the first is to bind up impurities and coagulate them on the top layer of the pot so they can be skimmed off. The second is to provide a protective cover, so that the liquid metal in the pot does not oxidize, or at least to delay the oxidation. What you use will to some degree depend upon whether you are using a dipper or a bottom pour pot.

Top left clockwise, 1. molten lead with oxides and junk floating, 2. Skimming dross with home made tool, 3. Melt after skim, 4. Flux dropped onto the melt which will be stirred in for one minute.
To get your pot fluxed, go cruise some likely… Take your flux of choice and add it to your molten lead. Start stirring. Expect and be prepared for lots of smoke, and possibly some flames if you try waxes or fats. In the tool department you can most definitely raid your wife’s kitchen stuff, but choose the cheap and little used stuff. Once you use the utensils for lead they are finished for table or food use. The Romans use lead to line their aqueducts and we all know what happened to them. Also anything with plastic handles is out. The heat from the lead travels up metal really quickly, so wooden or bone handles are a must. Stir your lead melt for about a minute after you have added your flux of choice, then skim off the dross.
Stir in your flux of choice and stir the pot for a full minute, then re-skim and add more flux stir briefly and allow the flux to congeal on the lead surface to reduce oxidation.
I made a couple of tools for this purpose from the metal strips you thread through the end chain link fence. They’re about 3/4″ x 1/4″ flat metal. I made wooden handles and wrapped them in gaffer’s tape. One has a hooked end, the other is straight. I stir with one and skim with the other. Again a word of caution. Always insert tools into the molten lead SLOWLY. Any moisture on the tools will sputter and throw lead around the room. Be careful.Add some new flux and allow that to float on the surface of your melt. One other word of caution, the material from which I fashioned these tools is galvanized which means they are (were) zinc coated to prevent rust. You do not want zinc in your alloys, so either file the zinc off or in my case pretend you didn’t notice for a pour or two and the zinc will be gone from the business end safely encapsulated in your first batch of lead projectiles which will likely be marginal anyway.

The dipper floating in the melt. Sorry about this shot, it was accidentally shot setting up the camera on the tripod for the next few shots. but you get the point right?
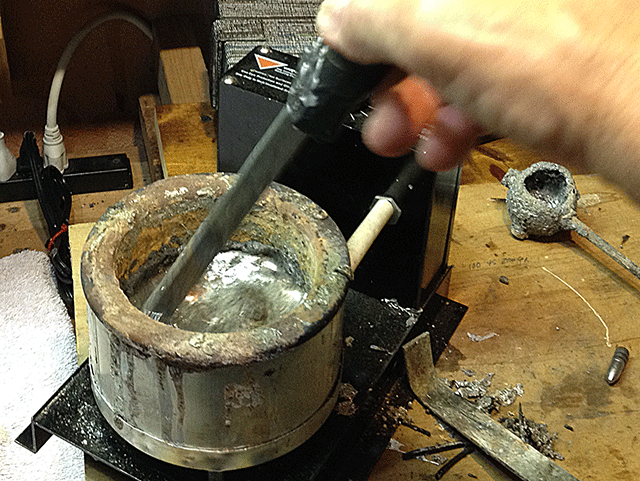
OK here we go… If you are dipping, take your dipper and float it on the melt for a minute or two, then sink it straight down, do not use it like a scoop. Lead is heavy and all the crap you don’t want in the middle of your bullets is floating on the top of your melt. If you use the dipper like a scoop, you will scoop up the dross. If you sink your dipper straight down, the lead will fill the dipper and refloat any dross it happens to pick up. Your dipper empties from below the surface of the lead inside, so here again, any dross should be floating on top.

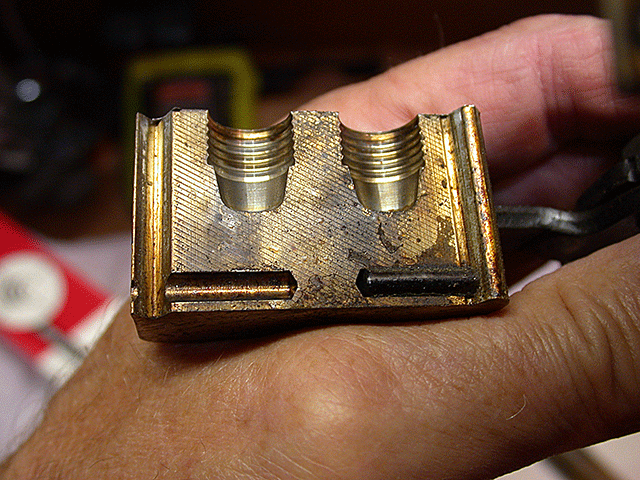
tip the mould 45 degrees toward the dipper, begin the pour and bring both back to level. complete the pour leaving a puddle on the sprue plate. Repeat for hole 2 after the lead in hole one solidifies.
Pick up your mould and close the halves making certain that they align and close properly flush one to the other. Close the sprue plate. Take your mould in one hand and the dipper in the other, I find it helps to tip the mould 45 degrees or so toward the dipper. Align the dipper spout and the entrance hole in the closed sprue plate and bring the two back to level. The lead should enter the mould. If you are using a two hole mould, wait a moment for the lead to gel, and repeat the procedure with the second hole. You want to leave a small puddle of lead on the top of the sprue plate. (Don’t worry, you will eventually adopt your own methodology for this procedure, I’m just telling you mine to give you and idea of how it MIGHT work) Return the dipper to the lead pot. It will float on the lead. As the lead cools inside the mould you should see the lead get “sucked” down into the sprue hole leaving a small dimple. This is exactly what you want to see. Once the lead has solidified, take your foot long section of broom handle, or wooden mallet, and whack the sprue plate open, cutting the lead base of the bullet. Open the mould.
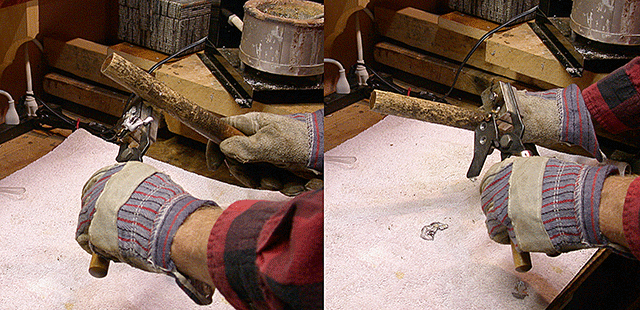
Once your lead has solidified enough, whack the sprue plate with your dowel and cut the sprue.
If you are supremely lucky, your newly cast bullet should drop out onto your soft towel. If they do not, take your mould bludgeon (the broom handle) and smartly rap the center pivot of your mould handle dislodging your bright shiny newly cast projectile onto the towel. OMG! what the F@$% is that? A puny wrinkly warped excuse for a projectile (maybe?). Don’t worry, there are a lot of factors working here, cold mould, possible petroleum based residue, any number of things are going to make your first few casts weird. So, just keep on keeping on. Pour, wait, open, tap.
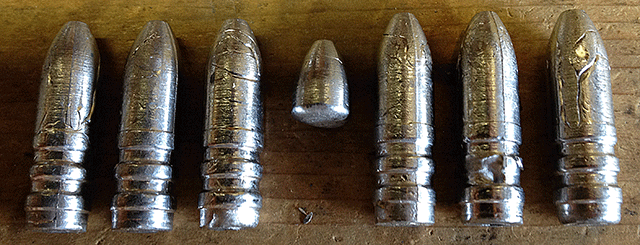
Some examples of poorly cast bullets. wrinkles and voids from too cold a mould, too cold lead, and/or oil in our moulds.
While were are working toward some actually useable projectiles, there are a couple of items we can go over. The sprue plate – it is held in place by a bolt and lock washer, better moulds also have a set screw through the side of the mould body. You want the sprue plate tight enough to cut the sprue cleanly, but loose enough to actually move when rapped with the mould bludgeon. You also want to lubricate the pivot point. Best way is simply touch a candle to the bolt momentarily while the mould is hot. Don’t over do, but also don’t be afraid to repeat this occasionally during your casting session. Also the alignment pins on your moulds like to be lubed, same thing here.

If you are using aluminum blocks they probably reached temp by the second pour, sometimes even the first. Steel moulds take a few more, but by now you should be dropping some nice projectiles. If not, there are pretty much only two reasons. Your moulds still have oil in them, or your moulds are not venting. Make certain that those little striations in the mould face are clean, and if your are still having issues with wrinkles, check to make certain that you have not over lubed the sprue plate or alignment pins, and if necessary, stop and clean the moulds again. Of course allow them to cool first. Before you start using them again, resmoke them.
well that’s about it for now anyway. Again this is simply the BASIC method of casting your projectiles, and as always, I disavow any level of expertise! Follow the instructions you read in the Lyman Cast Bullet handbook I told you to buy. The handbooks are written by experts so listen to them.
Lastly, the session I used to illustrate this article was a really quick one that I set up specifically for this blog. If you’ll notice you can see my bare hands in two of the shots. I realized this part way through the shoot, at which point I slipped on my long sleeve shirt and gloves. BUT!! In cleaning up after the shoot, (during which the gloves were on again an off again) I bent over the bench to unplug the pot and accidentally rested my hand (very briefly) on the mould I used to illustrate the article. Thereby giving myself a nasty burn! Never, ever, hurry or do this while distracted in any way. It will never work out well! You can’t tell hot hot these things are by looking at them or assuming they’ve cooled off.
Ok enough lecturing, hope you have fun and wait for it… Next up, Sizing and lube! Betcha can’t wait right?
